Warning: This experiment is edible. Be sure to use clean
equipment. Never make food in your science lab.
You will need
- ½ cup whole milk (low fat milk doesn't work as
well)
- 1 tablespoon sugar
- flavour for the ice-cream (Milo was used in this
experiment)
- 1 spoon
- 1 small zip-lock bag
- 1 larger zip-lock bag
- 1 tray of ice cubes
- 6 tablespoons of regular table salt
- ½ cup of water
What to do
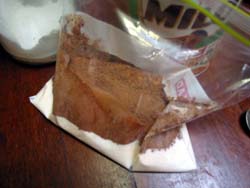
- Combine the milk, sugar and flavouring together
in the small zip lock bag.
- Seal the bag and shake it a few times so that
everything is mixed.
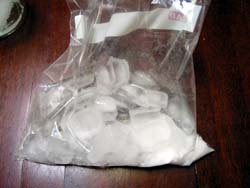
- In the large zip-lock bag, add the ice cubes,
salt and the water.
- Put the small bag (check the seal before doing
this) into the big bag and seal the big bag.
- Gently squish the two bags together for about
5-10 minutes.
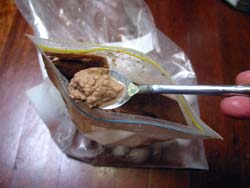
- As you do this the milk will start to freeze and
the ice-cream will form. The longer you agitate the
two bags the thicker your ice-cream will be.
What's happening?
The salt we add to the ice creates salt water which
is actually colder than ordinary iced water. In other
words, salt water has to get colder than 0 degrees
Celsius (°C) before it will freeze. In this case, milk
is like regular water and freezes when surrounded by
colder salt water. This allows the ingredients to mix
together to make ice cream.
The salt works by lowering the melting or freezing
point of water. The effect is termed 'freezing point
depression'.
When you add salt to water, you introduce dissolved
foreign particles into the water. The freezing point of
water becomes lower as more particles are added until
the point where the salt stops dissolving. For a
solution of table salt (sodium chloride, NaCl) in water,
this temperature is -21°C under controlled lab
conditions. In the real world, if you were to add salt
to a frozen footpath, sodium chloride can melt ice only
down to about -9°C.
Since salt interferes with ice crystals forming in
water, adding salt to water effectively lowers its
freezing point. This is why the oceans don't freeze,
even when the temperature is below 0°C. The ocean, which
is about 3.5% salt, freezes at approximately -2°C .
For saltwater that's as saturated as it can possibly
get (i.e. there's no way to dissolve any more salt in it
no matter how hard you tried), the freezing point is
-21.1 °C . This is when the saltwater is 23.3% salt (by
weight).
Applications
In colder parts of the world, salt is often used on
footpaths and roads to melt ice and snow. Salt is used
on roads and walkways because it is inexpensive and
readily available.
When ice melts, it absorbs heat energy from its
surroundings. When you add salt to ice, the rapid
melting of the ice can cool the ice and water to below
0°C. Before refrigeration was invented, ice and salt was
used to produce the rapid cooling needed to make
ice-cream.
There are a variety of ice-cream makers for home use.
Some of the older style tried-and-true ice-cream makers
use ice that is melted with rock salt to quick-freeze
the cream mixture. These are either hand cranked or
motorised. If you have the hand-cranked variety, have
some friends over and make a party out of taking turns
with the crank. It can be a lot of work.
More modern ice cream makers have a sealed metal
canister base filled with an anti-freeze type of liquid
that can maintain a lower temperature than ice.
You can make a more permanent ice cream maker by
replacing the zip lock bags used in this experiment with
sealable cans. Milo cans work well for this, but any
food safe containers will do, you just need to make sure
they are different sizes. Metal is best, but glass will
work, too. Plastic does NOT work, as it doesn't conduct
the cold very well. Be sure to tape or tie the lid down
firmly on the smaller container. Place it in the larger
can or other container and put in enough ice,
alternating with layers of rock salt two or three times,
to completely pack the cavity between the two cans.
Remember to agitate the cans, rolling on your bench top
works well for this.